

 English
 العربی
 Swedish
 François

ساخت یك خانم رؤیایی در فتوشاپ!
مطمئنم براتون آموزش جالبی خواهد بود...
درسته كه به زبان انگلیسی هست، اما باور كنید خیلی سخت نیست، بخشهایی كه من درشت كردم رو دنبال كنید تا طرحتون ایجاد بشه. نیازی به توضیح فارسی هم نداره.
1
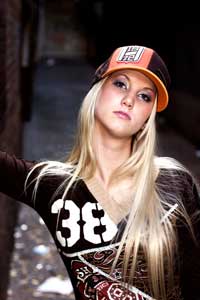
Open an image to edit.
2
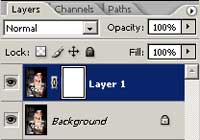
Duplicate the current layer (Ctrl+J) and add a layer mask (Layer> Layer Mask> Reveal All).
3
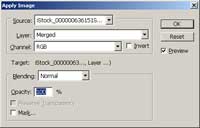
With the layer mask selected, use the Apply Image tool (Image> Apply Image) to apply the following properties:
Layer: Merged
Channel: RGB
Invert: Unchecked
Blending: Normal
4
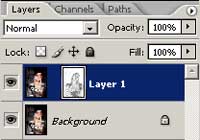
Unlink the current layer with its layer mask (Layer> Layer Mask> Unlink) then select the top layer (not its layer mask) by clicking on the left thumbnail in the Layers pallet.
5
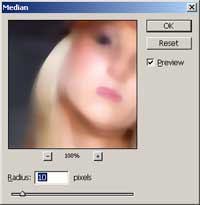
Apply a Median filter (Filter> Noise> Median) with a Radius that will blur most of the detail without losing the shape of the objects. For the 566x848 pixels image used for this tutorial, a Radius of 10 pixels was used.
.
- مطالب مرتبط:
- ساخت تصاویر پانوراما
- آموزش ترسیم خطوط مورب و موازی در فتوشاپ
- ایجاد كمان رؤیایی سبز رنگ در فتوشاپ
- ساخت بك گراند زیبای كاغذی در فتوشاپ، به سادگی تمام
- آموزش ساخت لوگوی یاهو مسنجر
- ------------
- یك كار جالب با فتوشاپ! ایجاد عكسهای مدور با فیلتر Polar Coordinates
- طراحی و ساخت سایت در یك نگاه
- شكلات شما آماده است! (آموزش ساخت طرح شكلات در فتوشاپ)
- آموزش ساخت دکمههای وب دوئی در فتوشاپ (How to create Web 2 Buttons in Photoshop)
- آموزش ساخت موی انسان در فتوشاپ
ارسال سؤال یا نظر
1- :
بوسیله: aair, در: Friday, 2006 October 27-کد: 67
دوست من تصاویر لود نمی شود
1- مشكل، رفع شد...:
بوسیله: Hamid, در: Monday, 2006 November 20-کد: 70
سلام؛ مشكل مربوط به تصاوير، رفع شد... ممنون از تذكرتون